
Author: John McCoy
The furniture on your AR-15 says a lot about you. It is a part that defines the shooter. Perhaps you are a traditionalist and opt for a standard M4-style MIL-SPEC drop-in handguard. Or you like the sleek and infinitely modifiable appearance and function of a free-floating handguard. On the other hand, maybe you are interested in a rubberized pistol grip like a Hogue, or an ergonomically sound design like a Magpul MOE grip. Whatever your take on furniture is, the handguard bears a lot of the focus. It is where you brace the rifle, you mount accessories, and frankly, it goes a long way toward the overall appearance of the rifle. A nice handguard makes the rifle, while a cheap handguard looks like a cheap handguard.
Types of handguards
While there are practically infinite possibilities for different handguards in terms of price, size, form, function, and style, there are only two basic handguards: drop-in or free-floating. Everything else is window dressing to these two basic types.
Free-floating
As the name suggests, a free-floating handguard is precisely that: it ‘floats’ around the barrel and gas tube. The primary benefit of a free-floating design is that it has no contact with the barrel assembly.
A barrel is at its most accurate when it is in contact and fastened to the receiver and the receiver alone. However, a handguard directly attached to the barrel will slightly influence the barrel.
When you grip the handguard and fire your rifle, it does pull the barrel ever so slightly if it is not free-floating. This phenomenon is not AR-specific; it happens to all rifles where the handguard directly contacts the barrel.
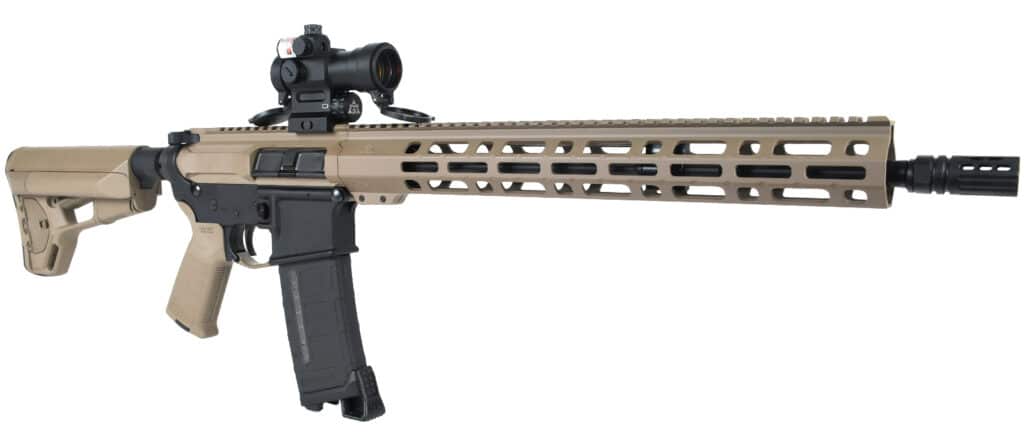
A free-floating handguard is attached directly to the barrel nut. It floats around the entire barrel assembly, causing no interference with the barrel while shooting. Truthfully, hardly any of us are a good enough shot for this ever to matter. At least I’m not.
Free-float handguards are made of a few different materials. The most popular are usually 6061 aircraft-grade aluminum, which is light while maintaining excellent durability. However, a few examples of carbon fiber free-float handguards and a few enterprising builders have even used PVC pipe. But, hey, if it works.
Drop-in Handguards
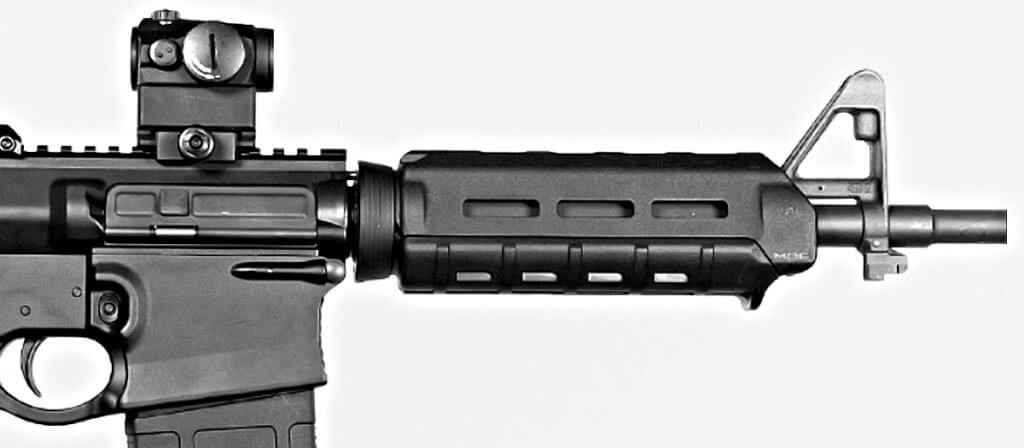
Drop-in handguards are generally the least expensive options, lightweight, and fairly straightforward to remove and install (with the Delta-ring tool, of course).
Drop-in handguards are the original stock for all variants of the AR-pattern rifle. They are still a great option for the budget-minded weapon. There is something nostalgic and practical about the classic polymer drop-in handguard. And these aren’t limited to just plastic; aluminum quad-rail units have been around for years and are a nice compliment to any carbine build.
Probably the greatest advantage to a drop-in handguard is the ease of replacement. It only takes a few seconds to pull the Delta ring back, and the two pieces of the handguard come apart and out. You can’t do that with a free-floating handguard. While it is not a huge deal, you generally need to have the rifle locked down on a vice block, and you will need some basic armorer tools. The drop-in handguard doesn’t require any tools (although the Delta-ring tool makes it much easier).
How To Install a Free-Float Handguard
Okay, so we have the basics down of how they are different from each other. Next, let’s deep dive into how these handguards work and how to install them. A free-floating handguard is typically attached to a proprietary barrel nut included with the handguard. But first, here is a list of items you will need for the project:
Tool List
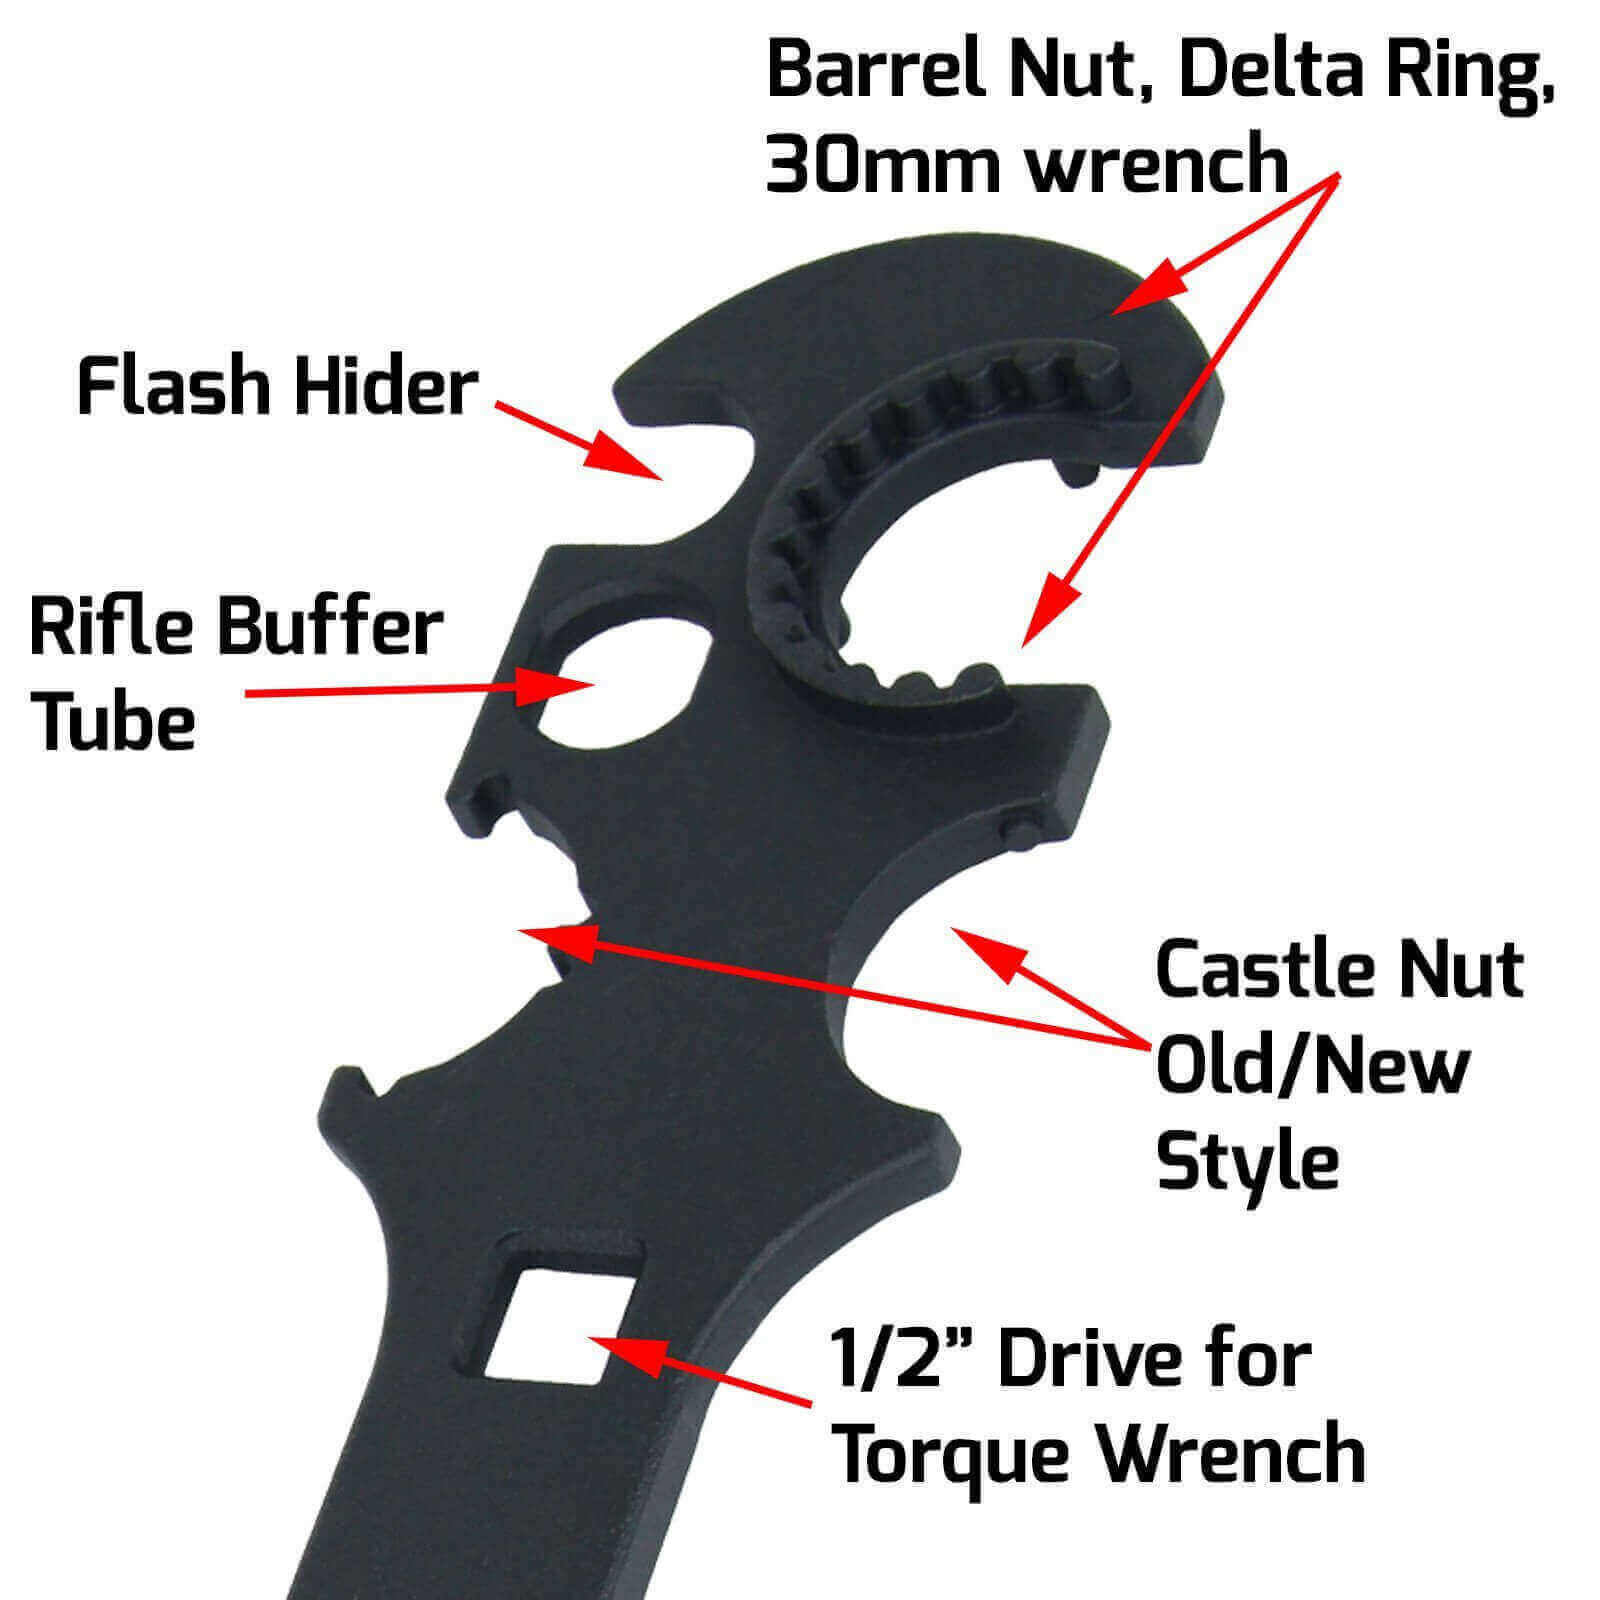
- Armorer’s wrench
- Nitrile disposable gloves
- Torque wrench
- Breaker Bar
- Gunsmithing non-metallic hammer
- SAE Hex Keyset (most manufacturers include allen wrenches)
- A set of punches, brass and steel preferred
- Loctite 243 (The blue stuff!)
- Aeroshell 64/33MS (Or lithium moly grease)
- Shop vice
- Receiver bench block
First, determine whether you are replacing a different type of handguard on an existing rifle or building a new upper from the ground up.
This is a personal aside, but if you have an M4 upper or an A2-style upper with the sight post, and you want to remove the sight post to install a free-floating handguard over a low-profile gas block, please don’t. If you’re doing a clean build, you won’t have to buy as many tools, or go through as many hassles. Barrels are pretty cheap, and you can choose one that suits your exact needs. Buy a fresh barrel and start a new upper. You’ll thank me later.
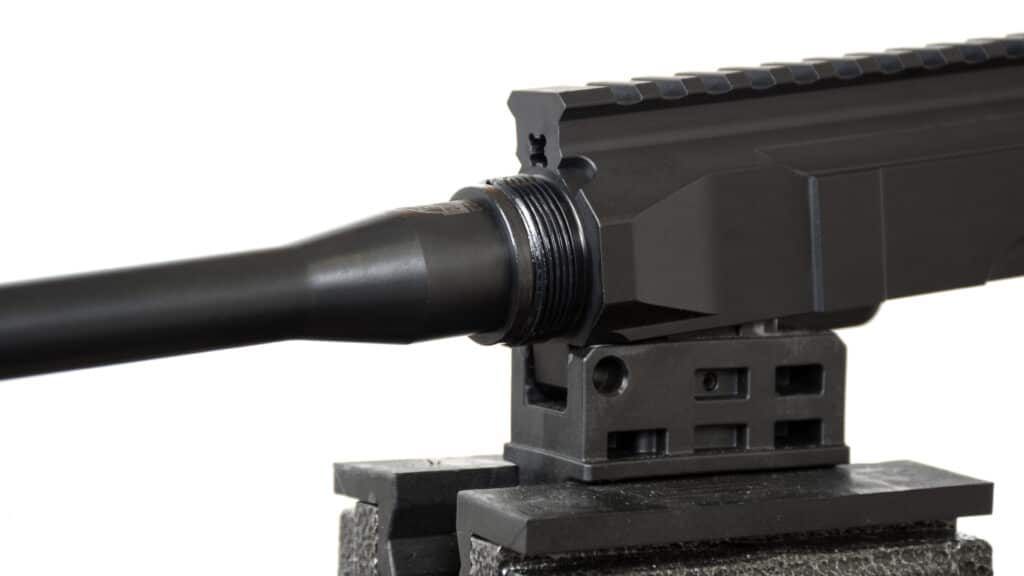
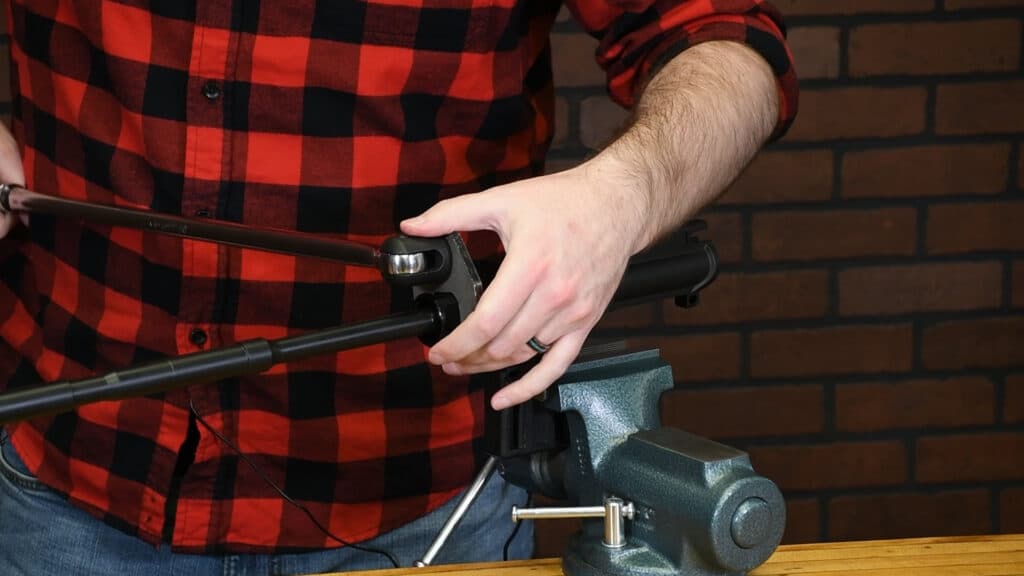
The first step is to put the upper receiver in a vice block and secure it. NEVER EVER put your receiver in a vice without a block. You will damage the receiver, period.
Once it is secured, check the barrel fit to the receiver. The barrel has a pin built into it matched to a notch in the receiver threads, so it can only be mounted one way.
If you are pulling off and replacing a different handguard, like a drop-in, you need to remove the old barrel nut or Delta ring nut. The Delta ring nut is a typical pattern, and all the standard AR-15 armorer tools have the pattern on them.
You will need to remove the old gas block, which will require a hex key to loosen. Or, in the case of a traditional front sight tower, the taper pins will need to be driven out. This is another reason why starting from a new batch of parts is a good idea. The more components you re-use, the more work and tools you’ll need to do the job right.
You can install the barrel nut when you are satisfied that the barrel lines up correctly with the upper receiver. Next, apply a light coat of Aeroshell 64/33MS anti-seize to the threads on the barrel. A little goes a long way with this, and it only needs a thin coat. Finally, you can use a fine brush or just dab a little on your fingers (with gloves on) and coat the threads.
Do not use standard anti-seizes that you would use on cars or trucks; it will promote corrosion. However, Aeroshell (or a similar moly grease) is cheap, and you can order it from Amazon, so get the right stuff. It is made for this application to ensure that galvanic corrosion does not occur, and it will prevent your barrel nut from seizing up over time. The science behind this is that galvanic corrosion occurs exclusively between two dissimilar types of metal, which you have in the steel barrel and the aluminum nut. Factor in extreme heat and a stew of corrosive gasses, and you have a recipe for corrosion.
Now that you have dutifully applied anti-seize to the threads, hand tighten the barrel nut down to ensure the threads are correct and there is no cross-threading. NEVER apply force immediately to the nut; always make sure you can hand tighten it first. If it isn’t tightening by hand and is not cross-threaded, there is something wrong with one of the threads. Destroying the threads by forcing it on will most likely void the return or warranty.
The instructions with your handguard will have the specific torque values, which will be a range of values somewhere between 30ft.lbs. and 80ft.lbs., so make sure you have a torque wrench that allows these values. The standard armorer’s wrench has a 3/8” drive square for the wrench, so make sure your wrench fits.
The torque range gives you a broad range to make sure the nut can be positioned appropriately since some of the nuts have positions that they must be in for the set screws to seat properly. Again, refer to the instructions that came with your handguard. If you under tighten, it will come loose, and your AR-15 handguard will have problems. If you over tighten, you will probably strip the threads on the softer aluminum nut, and you might even crack the upper receiver.
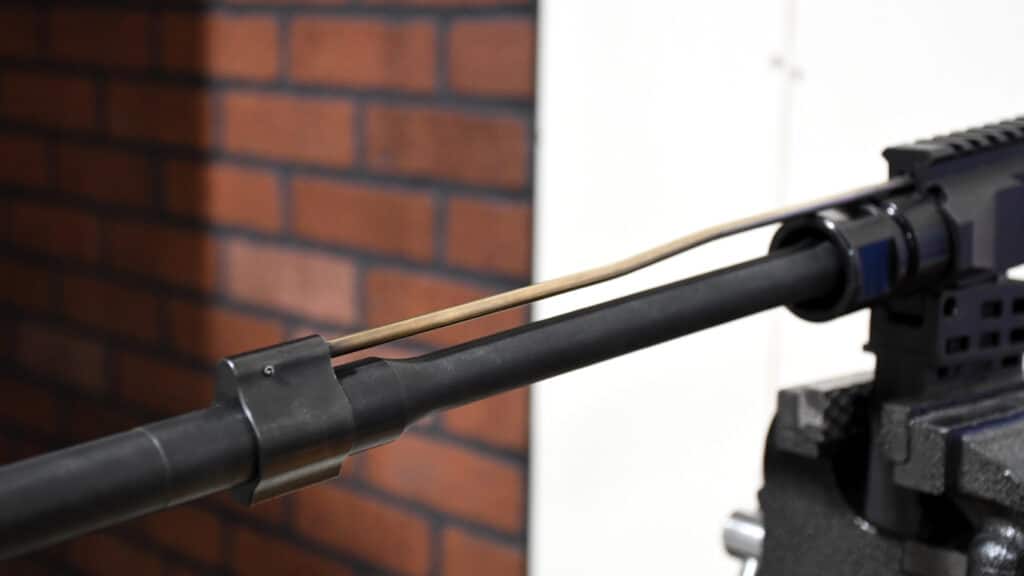
Once the nut is tightened appropriately, you can install the gas block and tube. Double-check your instructions to ensure your block will work, but they universally require a low-profile block for clearance.
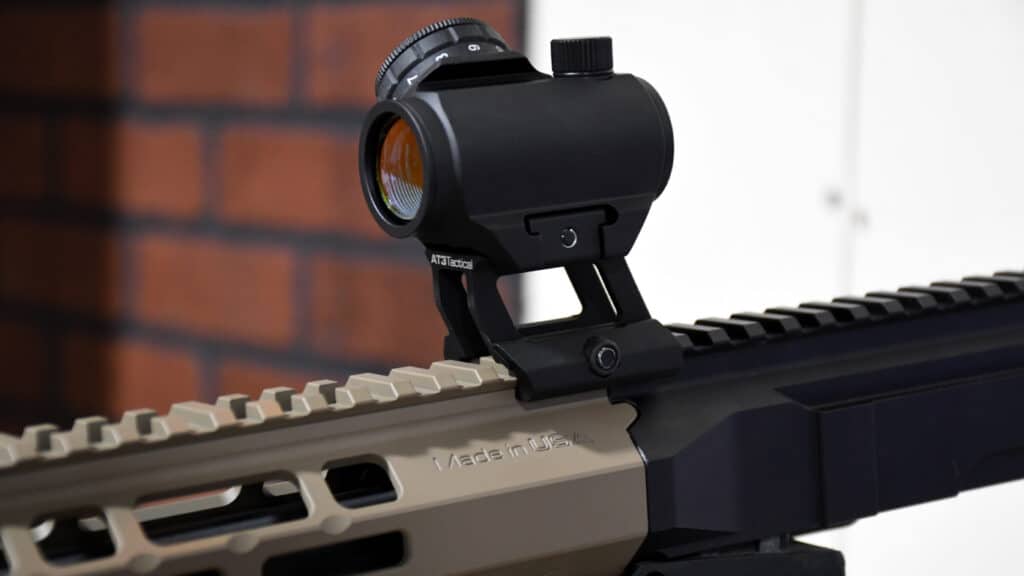
Now that the gas block and tube are installed, you can slip the handguard over, and you are ready to mount it to the barrel nut. First, you must ensure the rails are perfectly aligned between the upper receiver and the handguard upper rail. We have equipped our AT3 SPEAR handguard with anti-rotation tabs to interlock with our billet receivers, ensuring a perfect fit. Otherwise, a quick way to make sure the rails line up is to take the base off a red dot sight and place it over the joint between the two components. This handy trick will give you a seamless transition.
The only thing you have left now is to tighten down the set screws or the clamps on the handguard. Make sure to apply some Loctite to these so they don’t back out, and make sure to use Loctite Blue 242 and don’t use Red 271; Red 271 Loctite requires heat to remove the fastener once cured.
You can also install your muzzle device now since you still have it in a vice block.
Installing a free-floating handguard is a simple project if you have the right tools for the job. Thankfully, the tools required are tools that all AR owners need to have in the first place. If you don’t have them yet, go ahead and buy them because you will use them repeatedly. An essentials tool kit is the best place to start so you don’t end up piecemealing tools; get it all in one place.
Also, this article is not a substitute for the instructions included with your handguard. If it didn’t come with instructions, get with the manufacturer, and download them. And as always, keep your guns clean and happy shooting!
One Last Tip
If there’s anyone that knows the AR-15 platform, it’s the US military. As a special offer for our readers, you can get the Official US Army Manual for AR-15/M4/M16 right now – for free. Click here to snag a copy.